How to install your rubber mats
Your mats will fit perfectly in just a few minutes – no tools required.
Step by step
- 1
Remove the old mats
Completely remove any existing floor mats from the footwell.
- 2
Clean the footwell
Briefly vacuum the carpet so the mat lies flat and nothing rubs underneath.
- 3
Pick the right mat
Each mat is shaped for a specific position. Match the driver, passenger and rear mats by their shape.
- 4
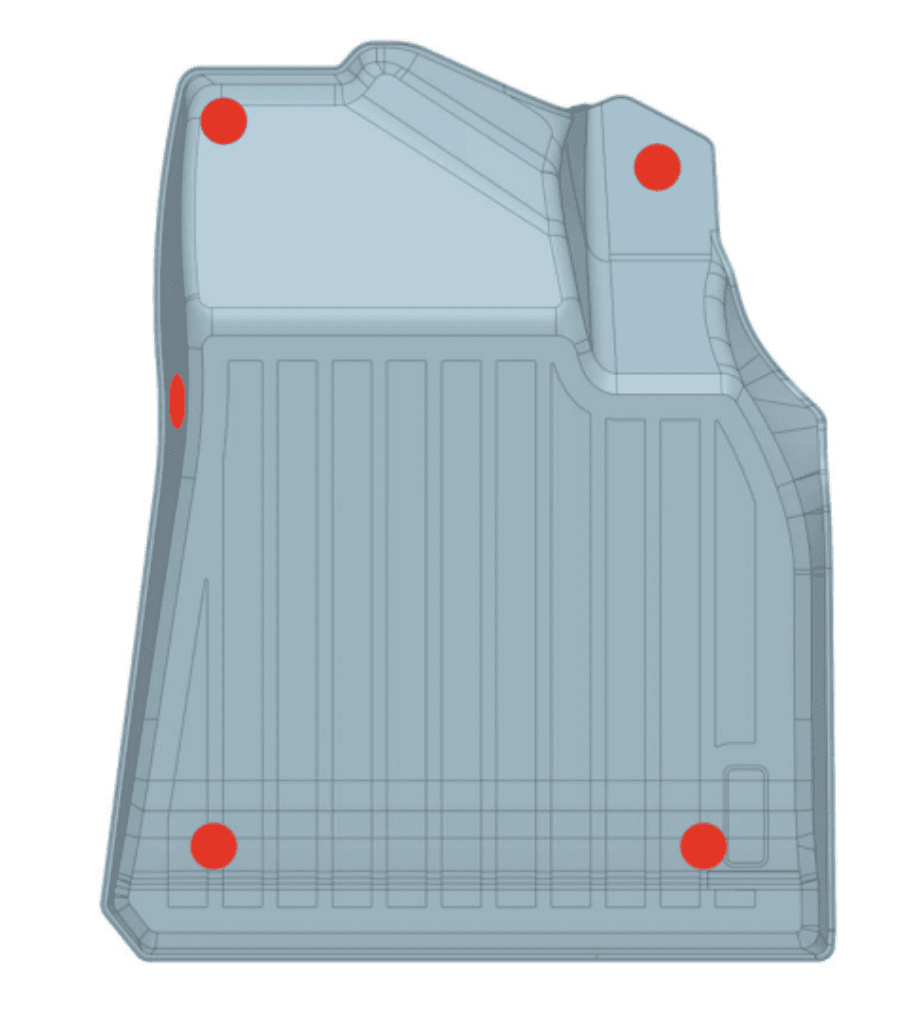
Attach the Velcro dots to the driver's mat
Stick the supplied Velcro dots onto the underside of the driver's mat at the five marked positions. They hold the mat firmly on the carpet so it cannot slide under the pedals.
- 5
Insert the mat
Place the front end of the mat in the footwell first, then lower it towards the back so the edges rest against the side walls.
- 6
Check the fit and press down
Press the mat down all around until it lies flat without any waves. On the driver's mat, press the Velcro dots firmly onto the carpet.
- 7
Check the pedals
On the driver's side, make sure the pedals move freely and can be pressed all the way down.
Tips for a perfect fit
- Mats are stiffer in cold weather. Let them warm up inside the car first so they settle faster.
- Never stack two mats on top of each other.
- To clean, simply take them out, rinse with water and let them dry thoroughly.